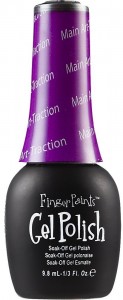
Review:
Finger Paints Gel Polish is one of the top discount gel polishes because it’s high quality and affordable. It goes on easily because it’s not super thick so you don’t have to worry about clumping. It only takes 2 coats for you to achieve a full glossy color. Another great thing about Finger Paints is that it has a lower cure time than other gel polish brands. It cures in 30 seconds with an LED lamp.
| Pros | Cons |
|---|---|
| Lower Price | Limited color selection |
| Cures very quickly | |
| Long Lasting | |
| Not too thick or thin | |
| Goes on easily |
Shop FingerPaints Gel Polish Sales Now

ll
Finger Paints Soak-Off Gel Polish Starter Kit
This kit is amazing because it includes everything you need to get started and sets you up to DIY gel nails like a pro at home. It simplifies the whole process and even gives you a how to DVD to become an expert! The color coat needs to be purchased separately so you can pick your favorite color instead of getting stuck with a color in the kit that you might not ever wear.
What’s included in the Starter Kit

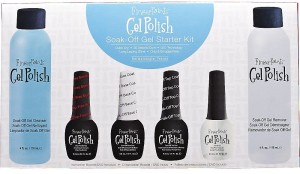
FingerPaints Soak-Off Gel Cleanser
- Chip-Free Bonder
- Soak-off Base Coat
- Soak-off Top Coat
- Cuticle Oil
- Soak-Off Gel Remover
- Instruction Booklet and DVD
Color Selection:
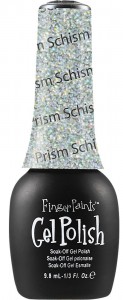
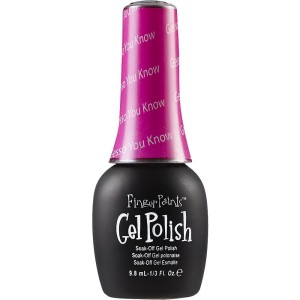
There are 27 colors with a variety of matte, sheer, shimmer and sparkle options. My 2 favorite colors are the sparkly “Prism Schism” and the beautiful deep pink “Gesso You Know
“
.
Finger Paints Gel Polish Instructions
1. Trim & Clean Your Nails:
File your nails to shape them and then use a brush to dust off your nails to remove all the dust from filing. Shape your nails to the shape you want then use a nylon brush to dust off your nails. Apply a cuticle remover on your cuticles and then push back each cuticle gently with a metal or wood cuticle pusher. If you have tough cuticles then you can soak them in warm water to soften them for one to two minutes before you push back your cuticles. Next, you buff your nails to increase gel adhesion to your nail!
2. Apply FingerPaints Chip-Free Bonder
Paint a thin layer on the tips of your fingernails (this step isn’t necessary for pedicures). This gives an extra layer adhesion to ensure the gel base coat sticks like glue to your nails!
3. Apply the Soak-Off Gel Base Coat
Shake the bottle to blend, then apply on your nails carefully trying not to get it on cuticles or fingers. It doesn’t harm your cuticles or fingers but when the polish cures under the UV lamp it can become sticky and hardened making it difficult to get off. Then immediately put your hands under the UV/LED lamp to cure for 30 seconds.
4. Apply the Gel Color Coat
This is the color coat so it’s important that you apply it evenly. Once applied, then cure for 30 seconds. I really like to layer on and cure a second coat for another 30 seconds to make the color bolder, especially if I’m working with a sheer polish.
5. Apply the Soak-Off Top Coat
This coat is a critical step and is key in creating a long lasting manicure. Apply a thin layer then cure for 30 seconds.
7. Get Rid of the Stickiness
Your nails should feel sticky or “tacky” at this point. Don’t be alarmed, it’s just how the gel cures and is exactly what’s supposed to happen! Simply use lint free pads and 99% Isopropyl Alcohol to remove it. There are special scrubs and lint-free wipes but Isopropyl alcohol and regular cotton pads work just fine! Once you’ve wiped down your nails the stickiness will be gone and you’ll be ready to show your hands off to the world!
Your nails will last for 2 weeks without chipping! To learn how to remove Finger Paints Gel Polish checkout my Ultimate Gel Removal Guide.

my aunt got me a gel finger paint polish. but it wont dry in the air? does it require uv light?
Hello Ashley,
Your aunt may have mistakenly purchased the gel polish by mistake. The FingerPaints polish line is produced exclusively for Sally Beauty and comes in 3 varieties:
FingerPaints Nail Color – like regular lacquer polish
FingerPaints Endless Wear – extended wear lacquer polish
FingerPaints Gel Polish – gel polish that must be cured using an LED lamp. You will also need both the base coat and top coat as it is a 3 part system.
I hope this helps.